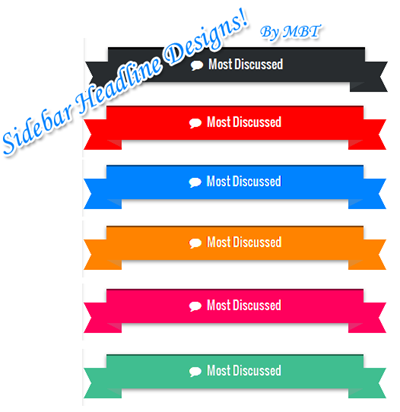
Create Ribbon backgrounds in Blogger
To create a ribbon background for any Sidebar widget, first we need to know the ID value of that widget. For that do the following:Finding the Widget ID Value:
- Go To Blogger > Layout
- Click the edit button to open your widget
- In the address bar section of the widget window that pops up you will find a long http URL. Towards the end of the link you will find the widgetid value as shown below. Which is HTML3 in our case.
4. Copy this widget value in exact same form.
5. Done! Move to next steps now.
Note: This widget
5. Done! Move to next steps now.
Note: This widget
Designing the ribbon Background with CSS3
- Go To Blogger > Template
- Backup your template
- click Edit HTML to open the template editor
- Inside the editor hit Ctrl + F to open a search box.
- Search for ]]></b:skin>
- Just above it paste the following style code:
{
position: relative;
padding: 10px 0px 15px !important;
margin: 0px 0px 10px 27px !important;
color: #ffffff;
background-color: #282C2F;
box-shadow: 0px 2px 4px rgb(136, 136, 136);
border-top: 3px solid #000000;
background-image: none !important;
height: auto !important;
width: 338px;
}
#HTML13 h2:before
{
content: ' ';
position: absolute;
width: 30px;
height: 0;
left: -30px;
top: 16px;
border-width: 20px 10px;
border-style: solid;
border-color: #282C2F #282C2F #282C2F transparent;
}
#HTML13 h2:after
{
content: ' ';
position: absolute;
width: 30px;
height: 0;
right: -30px;
top: 16px;
border-width: 20px 10px;
border-style: solid;
border-color: #282C2F transparent #282C2F #282C2F;
}
#HTML13 h2 span:before
{
content: ' ';
position: absolute;
width: 0;
height: 0;
left: 0px;
top: 100%;
border-width: 5px 10px;
border-style: solid;
border-color: #353A3D #353A3D transparent transparent;
z-index:99999;
}
#HTML13 h2 span:after
{
content: ' ';
position: absolute;
width: 0;
height: 0;
right: 0px;
top: 100%;
border-width: 5px 10px;
border-style: solid;
border-color: #353A3D transparent transparent #353A3D;
z-index:99999;
}
Follow these customization tips to give your ribbon any color you want:
- To change the background color of the ribbon edit the hexadecimal color codes highlighted as yellow i.e: #282C2F
- To change the background color of the ribbon tails edit: #353A3D Tip: Give it a slightly lighter shade compared to the background. See an example of ribbon tails below. Background is Red but tails are lighter Red.
- To change the text color edit #ffffff
- To change the color of border top edit #000000; if you don't want to add a border then delete border-top: 3px solid #000000;
- To change the width of the ribbon background edit 338px
8. Expand the code by clicking the black arrow. You will need to expand it one more time.
9. In the expanded code you will find this code:
<h2 class='title'><data:title/></h2>Replace it with this one:
<h2 class='title'><span><data:title/></span></h2>Here we simply enclosed the sidebar Headline with a Span tag in order to apply the ribbon tail effect. The headline could have a Tag <h2> or <h3> or even <h1> . This tag may differ in custom templates.
10. Save your template and you are all done!
Need Help?
We hope this tutorial helps you further decorate your blogs like never before and create beautiful widgets that may engage your readers even more. Let us know if you need any help. Peace and blessings buddies. :)
Subscribe via email
Receive Quality Tutorials Straight in your Inbox by submitting your Email ID below.
How To Add Fancy Ribon Backgrounds to Blogger Sidebar
4/
5
Unknown


If you like our post or have any suggestion or got stuck at any step implementing the widget to your blog then leave a comment below i will be glad to help you out.